
Why? Link to heading
Not so long ago I turned my attention to a note-taking tool called Obsidian. This discovery for me was a simple and convenient solution for recording various thoughts and ideas. I may not have a particular need to take notes, but sometimes there is a desire to record something important.
In Obsidian everything is simple. You have your files, you get a handy editor for any platform, enriched with a variety of plugins. And you are completely free to choose what to do with it all.
I encountered a similar problem with my personal site. All these editors with WYSIWYG-interface seem inconvenient, while all the action takes place on the web without the possibility of normal autosaving in the process. I have to write the material in one place, then move and edit it in another to make it look acceptable. Yes, all of these problems can certainly be solved, but I’d rather spend time and energy writing content than struggling with the tools.
In the process of using Obsidian, I started to think about how great it would be if I could write articles for the site with the same ease. That’s how I discovered Hugo and decided to combine the two tools to make using them as comfortable as possible.
Let’s start! Link to heading
In my opinion, having a separate obsidian vault for a website would be more convenient. So, the first step is to create a Hugo site:
hugo new site obsidian-hugo-demo
Once that is done, we can look for a cool theme for our future website. For Hugo, this can be easily accomplished by visiting website. I found a theme that I like, and we should place it in the themes/ folder:
git submodule add https://github.com/nanxiaobei/hugo-paper themes/paper
Next, we need to make changes to the hugo.toml file. Here is the source code for the necessary modifications. Additionally, we should create some folders in the Obsidian content/ folder. You can refer to the provided source code for the folder structure.
baseURL = 'http://example.org/'
languageCode = 'en-us'
title = 'My New Hugo Site'
theme = "hugo-paper"

[module]
[[module.mounts]]
source = 'content'
target = 'content'
excludeFiles = ['templates/**']
cd content
mkdir -p posts/assets
mkdir -p content/templates
mkdir -p layouts/_default/_markup
touch layouts/_default/_markup/render-image.html
touch layouts/_default/_markup/render-link.html
layouts/_default/_markup/render-image.html:
{{- $url := urls.Parse .Destination -}}
{{- $scheme := $url.Scheme -}}

<img src="
	{{- if eq $scheme "" -}}
		{{- if strings.HasSuffix $url.Path ".md" -}}
			{{- relref .Page .Destination | safeURL -}}
		{{- else -}}
			{{- printf "/%s%s" .Page.File.Dir .Destination | safeURL -}}
		{{- end -}}
	{{- else -}}
		{{- .Destination | safeURL -}}
	{{- end -}}"
	{{- with .Title }} title="{{ . | safeHTML }}"{{- end -}}
	{{- with .Text }} alt="{{ . | safeHTML }}"
	{{- end -}}
/>

{{- /* whitespace stripped here to avoid trailing newline in rendered result caused by file EOL */ -}}
layouts/_default/_markup/render-link.html:
{{- $url := urls.Parse .Destination -}}
{{- $scheme := $url.Scheme -}}

<a href="
{{- if eq $scheme "" -}}
	{{- if strings.HasSuffix $url.Path ".md" -}}
		{{- relref .Page .Destination | safeURL -}}
	{{- else -}}
		{{- .Destination | safeURL -}}
	{{- end -}}
{{- else -}}
	{{- .Destination | safeURL -}}
{{- end -}}"
{{- with .Title }} title="{{ . | safeHTML }}"{{- end -}}>
{{- .Text | safeHTML -}}
</a>

{{- /* whitespace stripped here to avoid trailing newline in rendered result caused by file EOL */ -}}
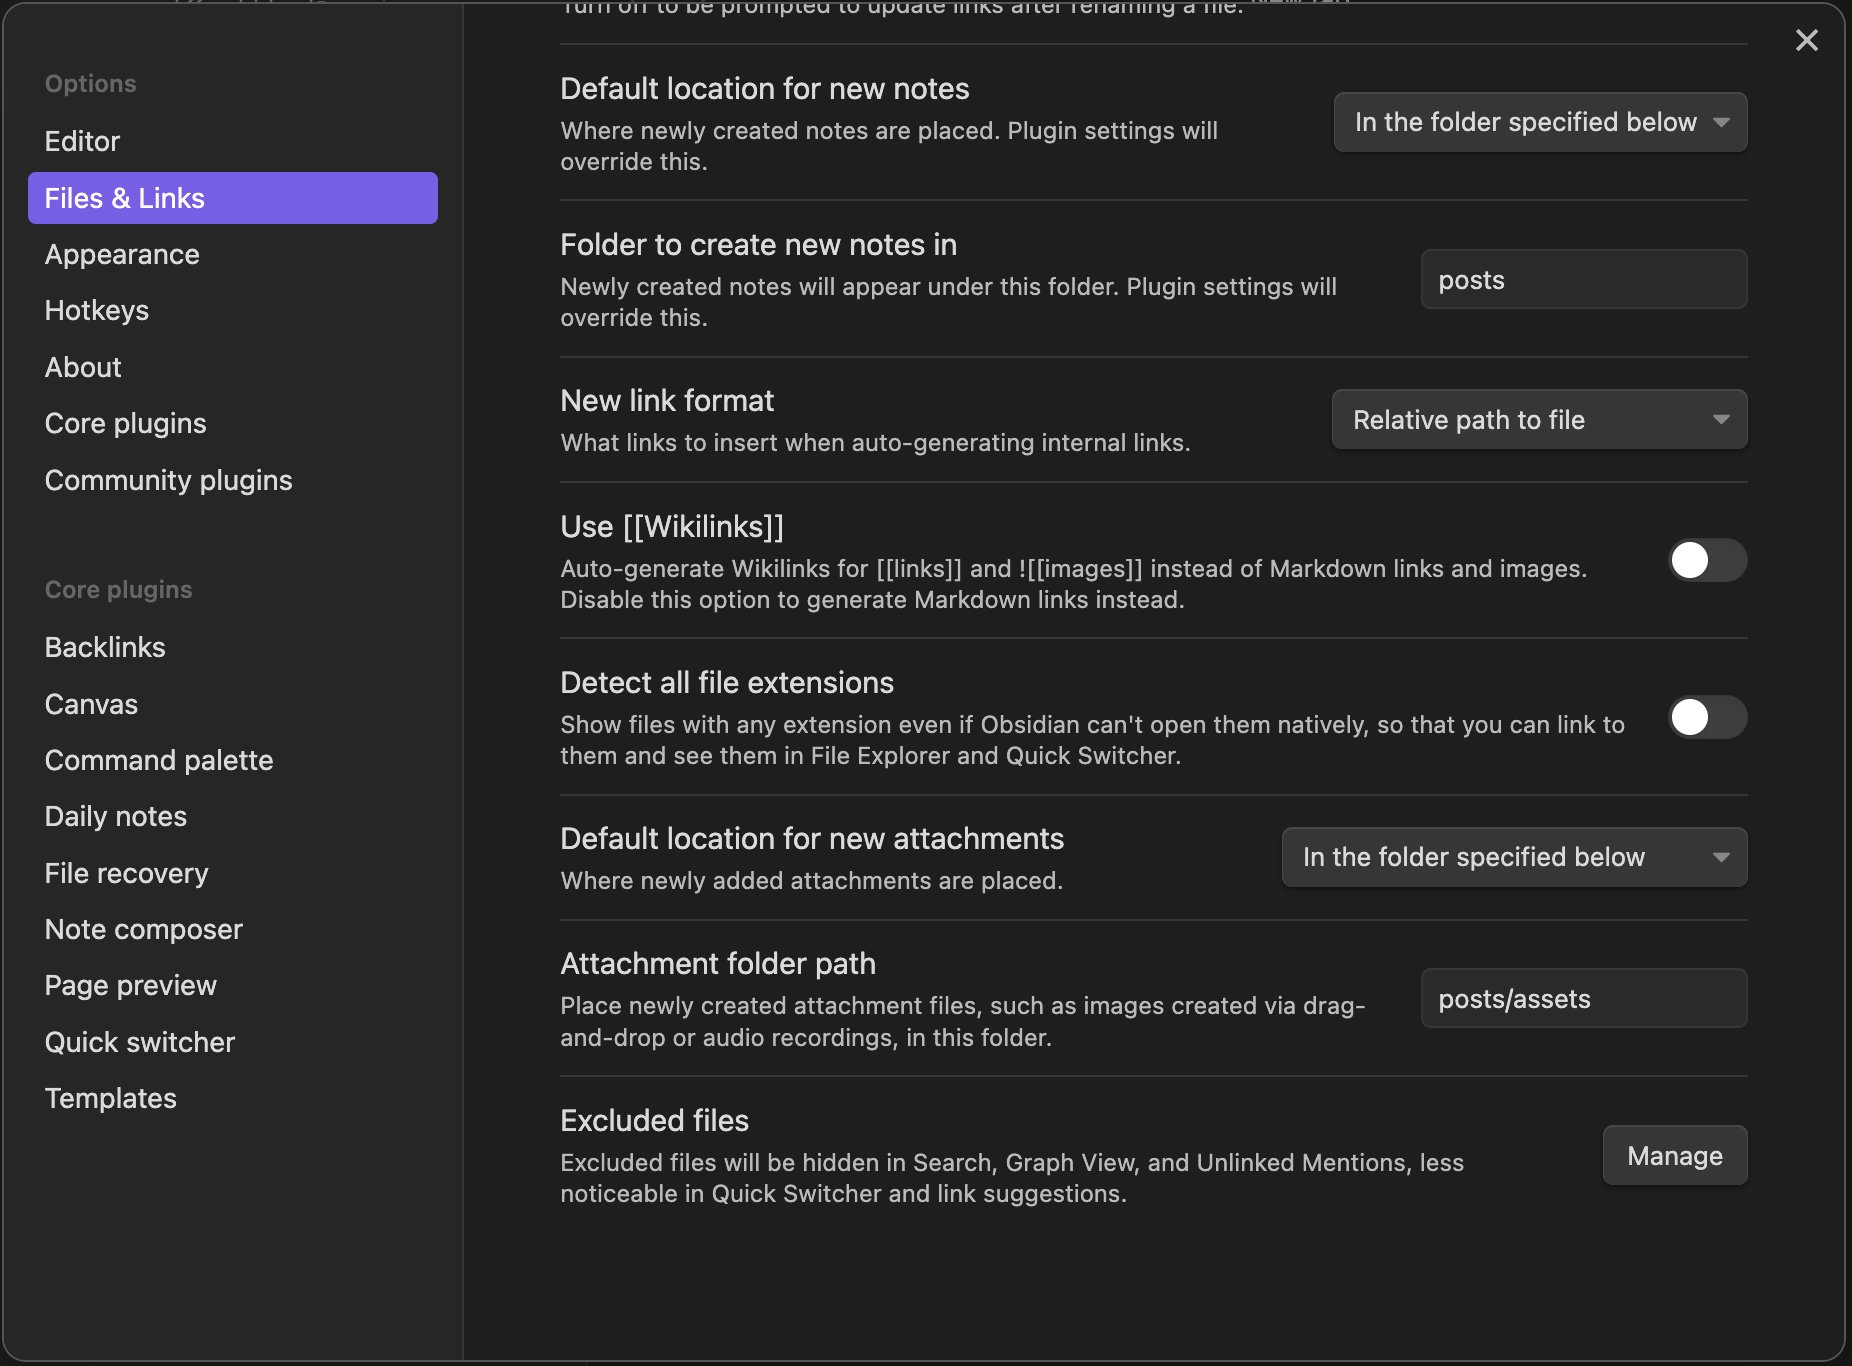
Now that we have completed the initial setup, we are ready to open the content/ folder as an Obsidian vault and configure some Obsidian settings. Please refer to the screenshot for the specific settings. One important adjustment is to disable Wikilinks since we will be writing markdown files and specifying folders for new notes, attachments, and link formats.
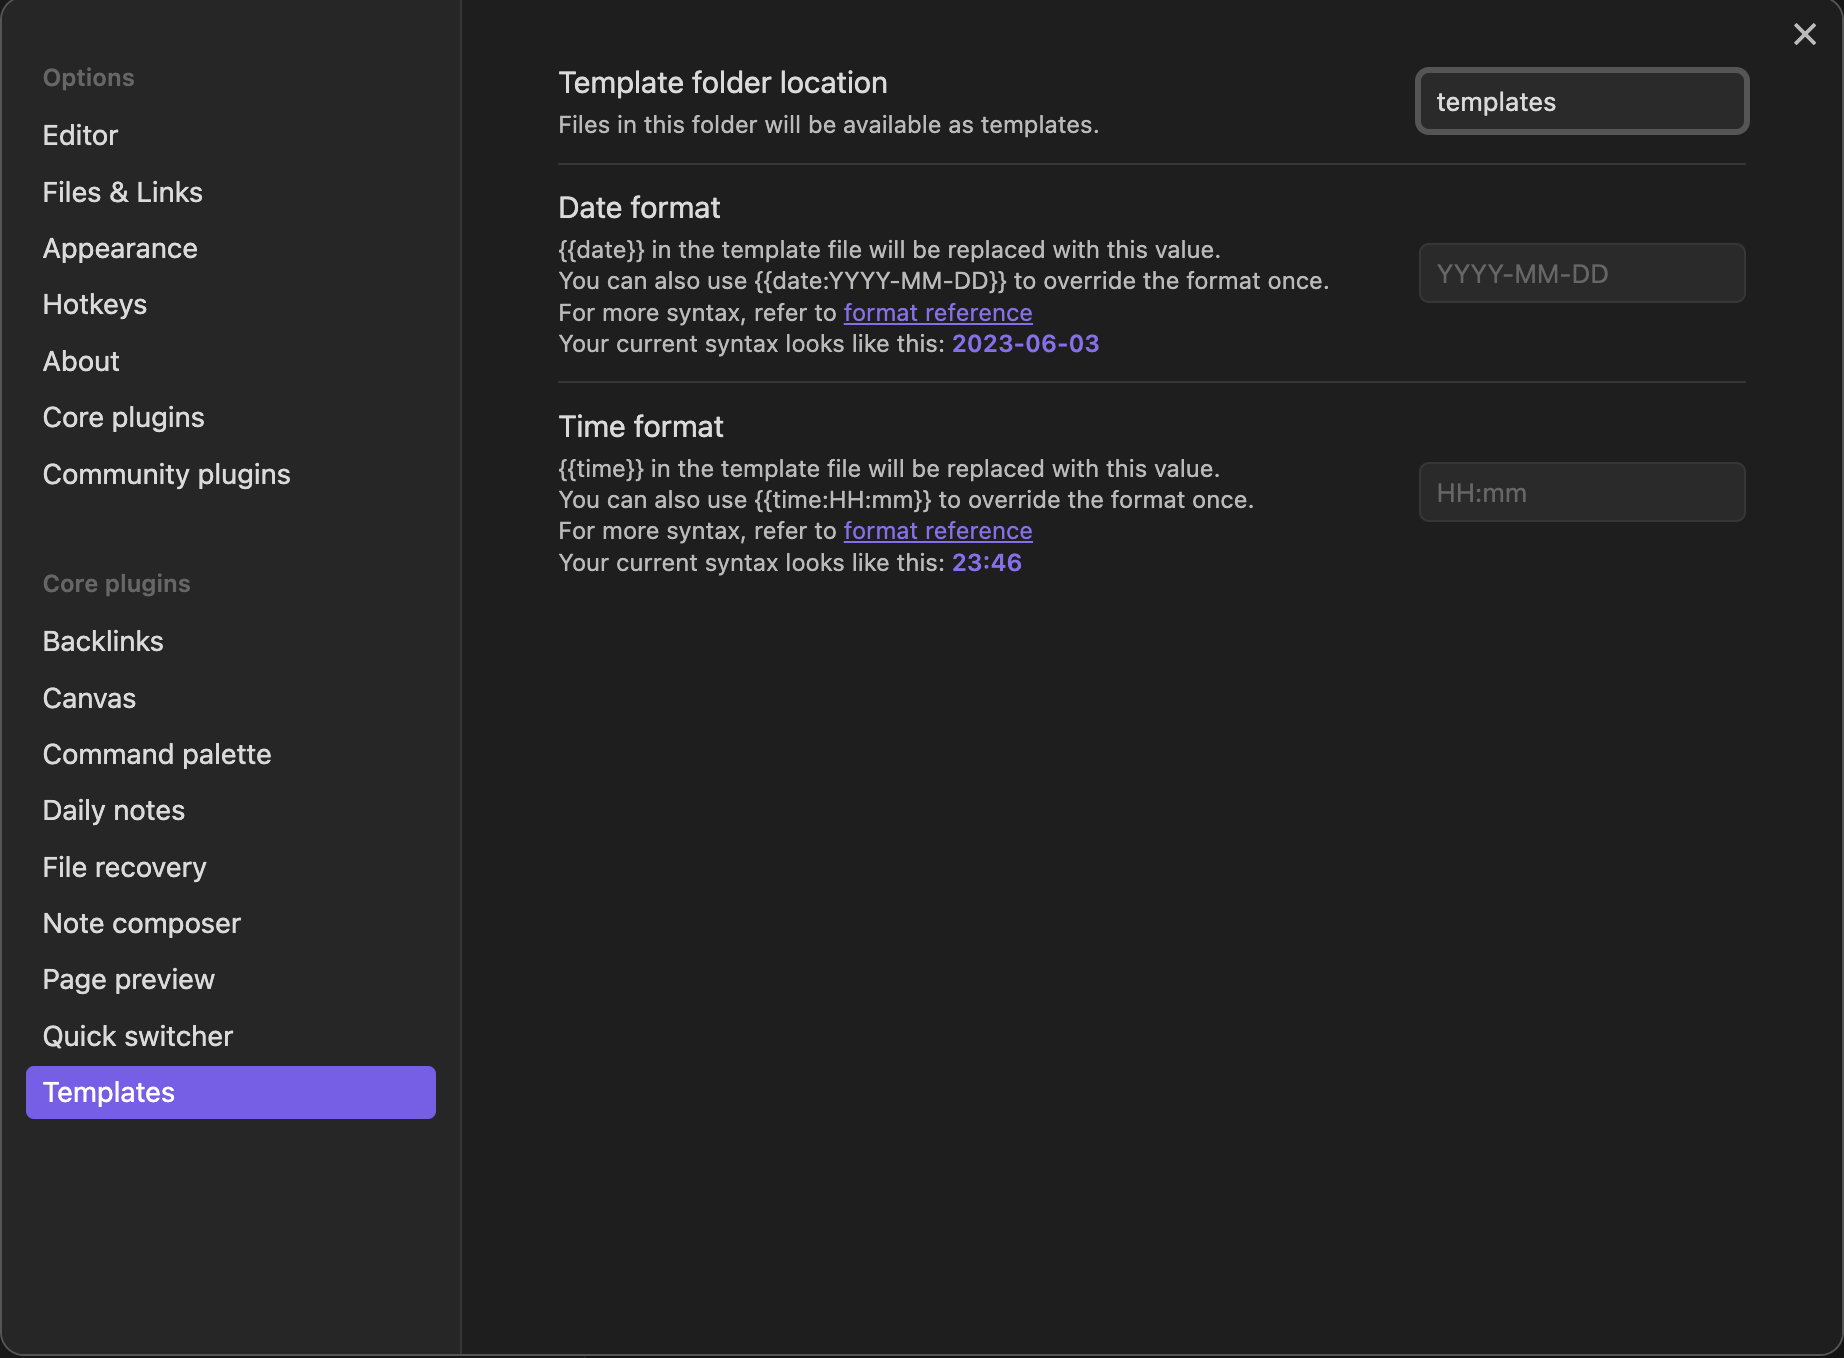
We also need to specify the templates directory and create a template for posts. The screenshot will guide you through these steps.
I use this:
---
date: {{date}}
authors:
- quantick
title: {{title}}
tags: []
categories: []
series: []
---
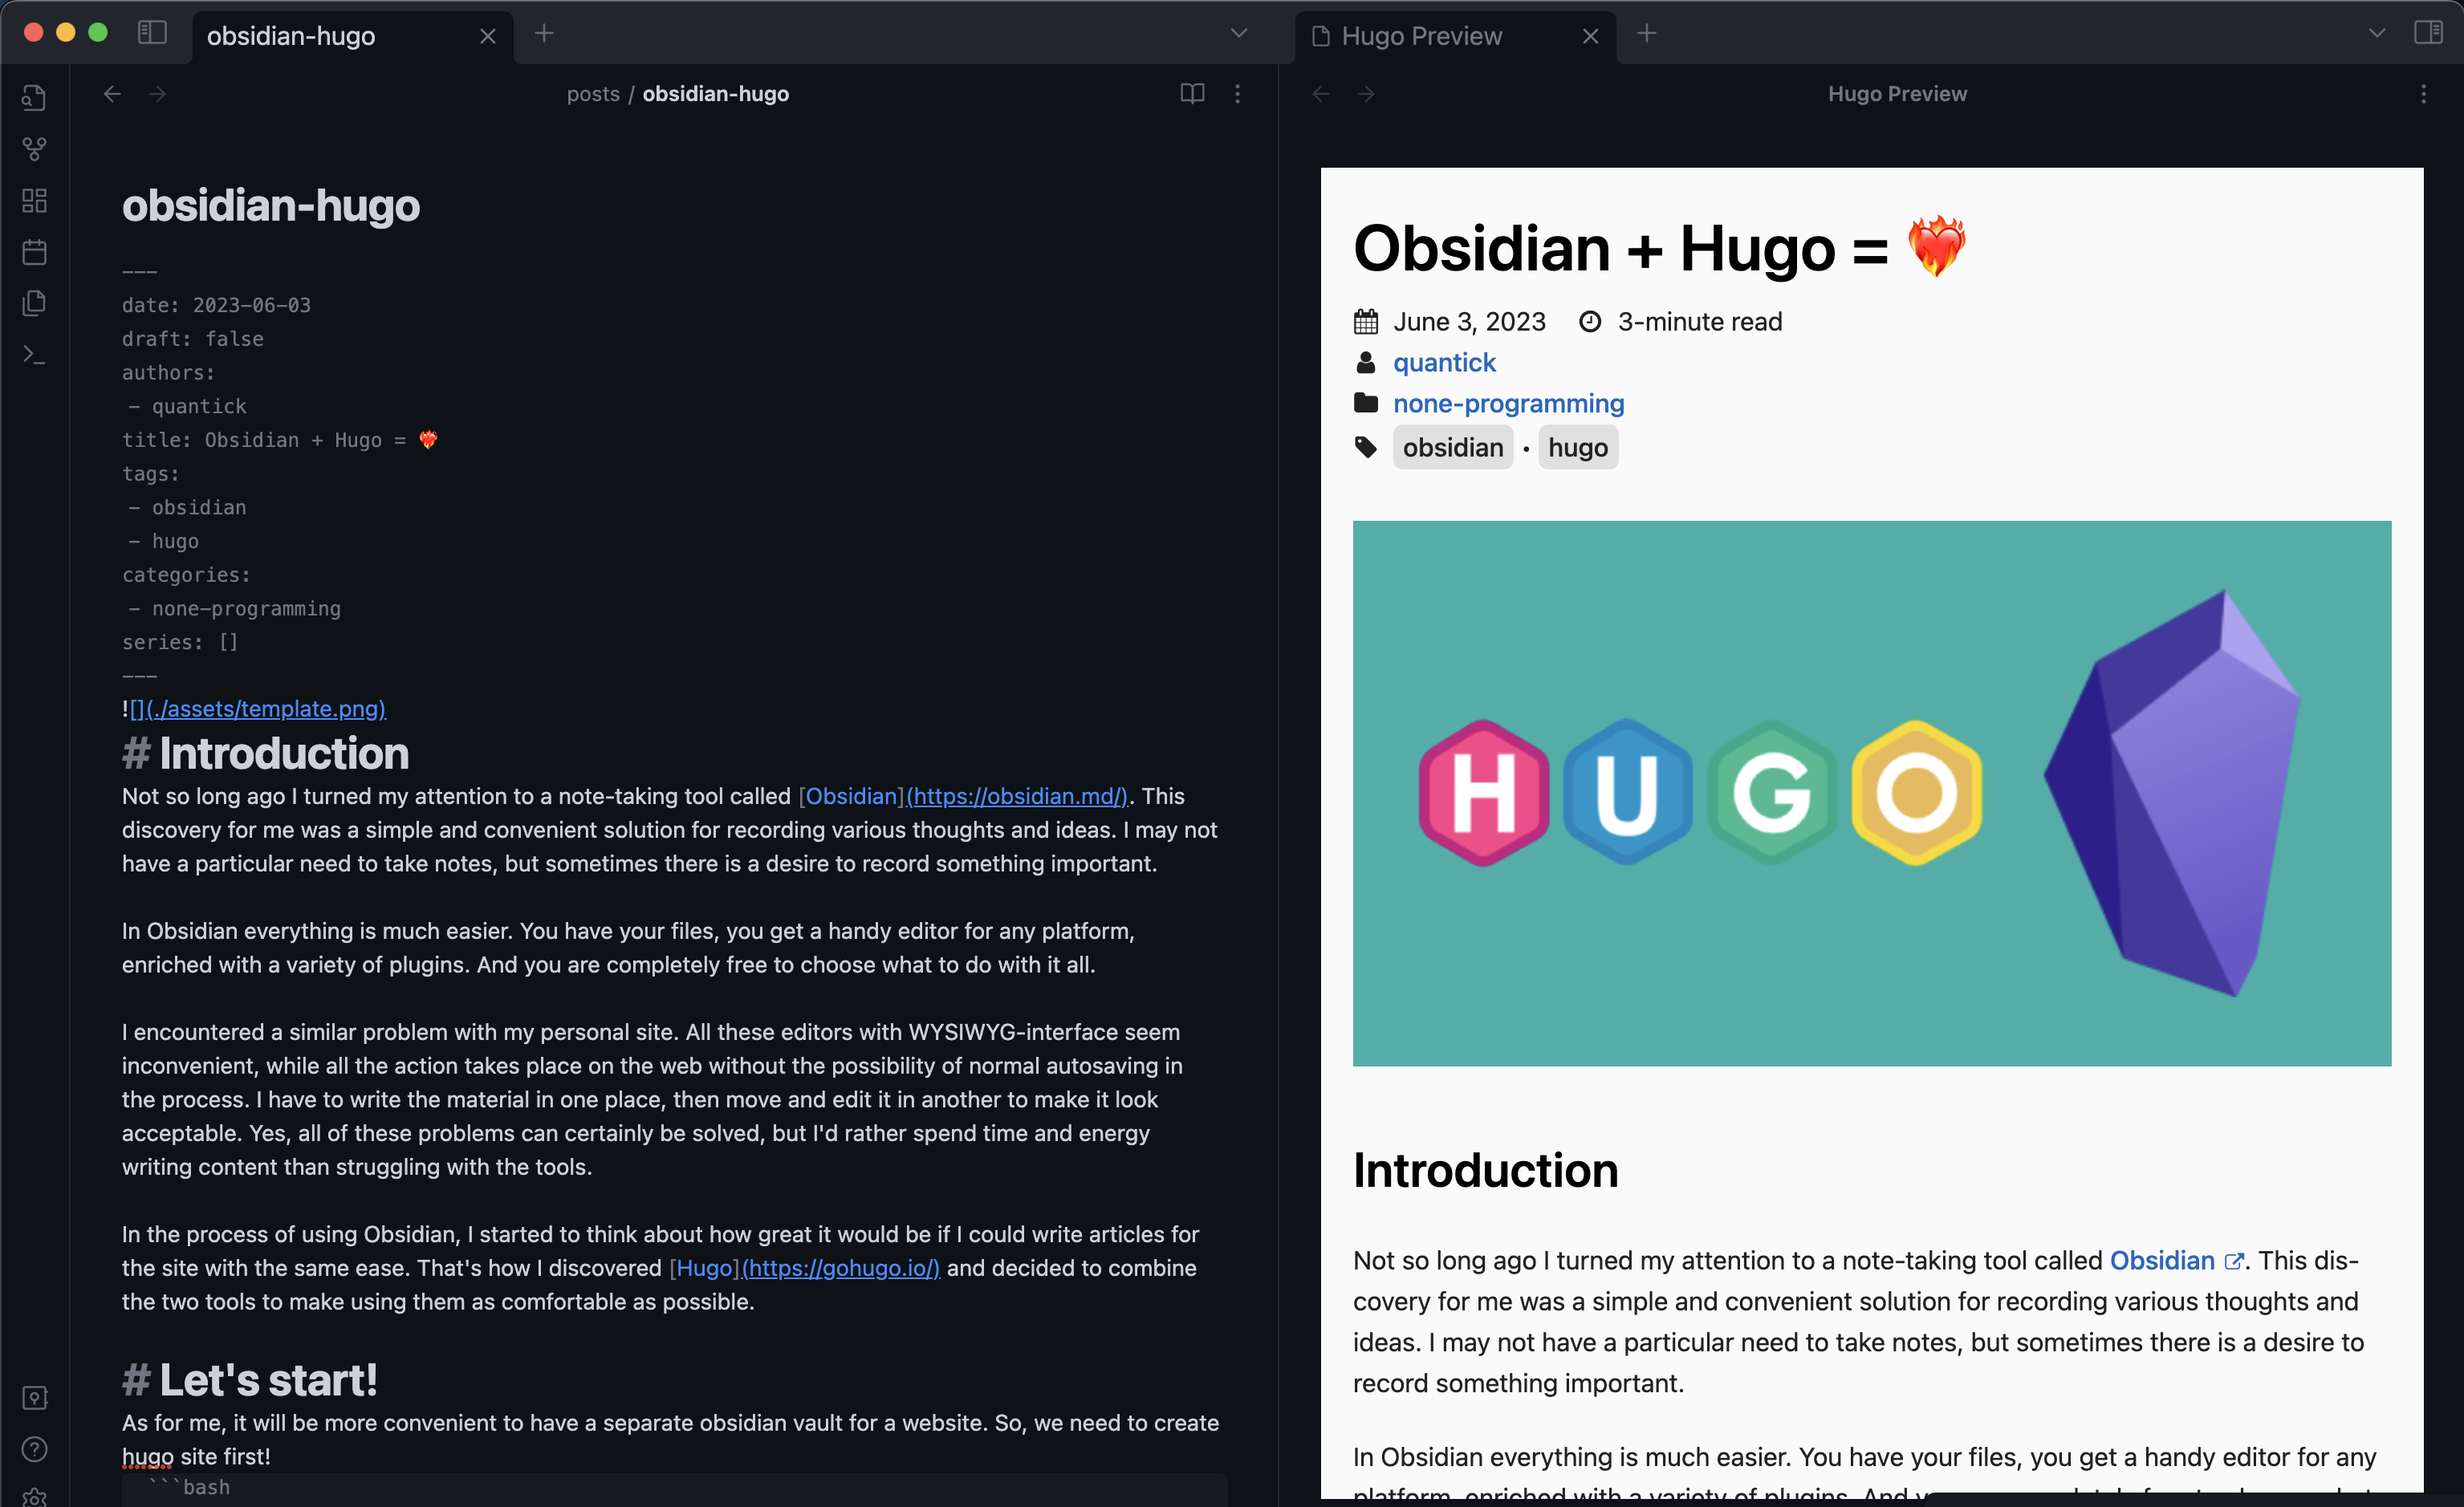
With these preparations in place, we can now create our first note. Press ctrl+N to create a new note, and then use ctrl+P to open the command palette and run the “Insert template” command.
Afterwards, we can start the Hugo server using the provided command. This will allow us to see our website in action.
hugo server
And there you go!

Result Link to heading
In my opinion, this combination of tools for note-taking is excellent. Obsidian is simple and easy-to-use, while Hugo provides powerful website-building capabilities. With the help of Obsidian plugins, creating posts for your website becomes a breeze. Personally, I use the Hugo obsidian preview plugin, which generates previews of my future posts in the website design. It’s still a bit rough around the edges, but overall, it’s a great tool.
If you’re interested, you can find the repository with the source code and a demonstration of the website hosted on GitHub Pages.